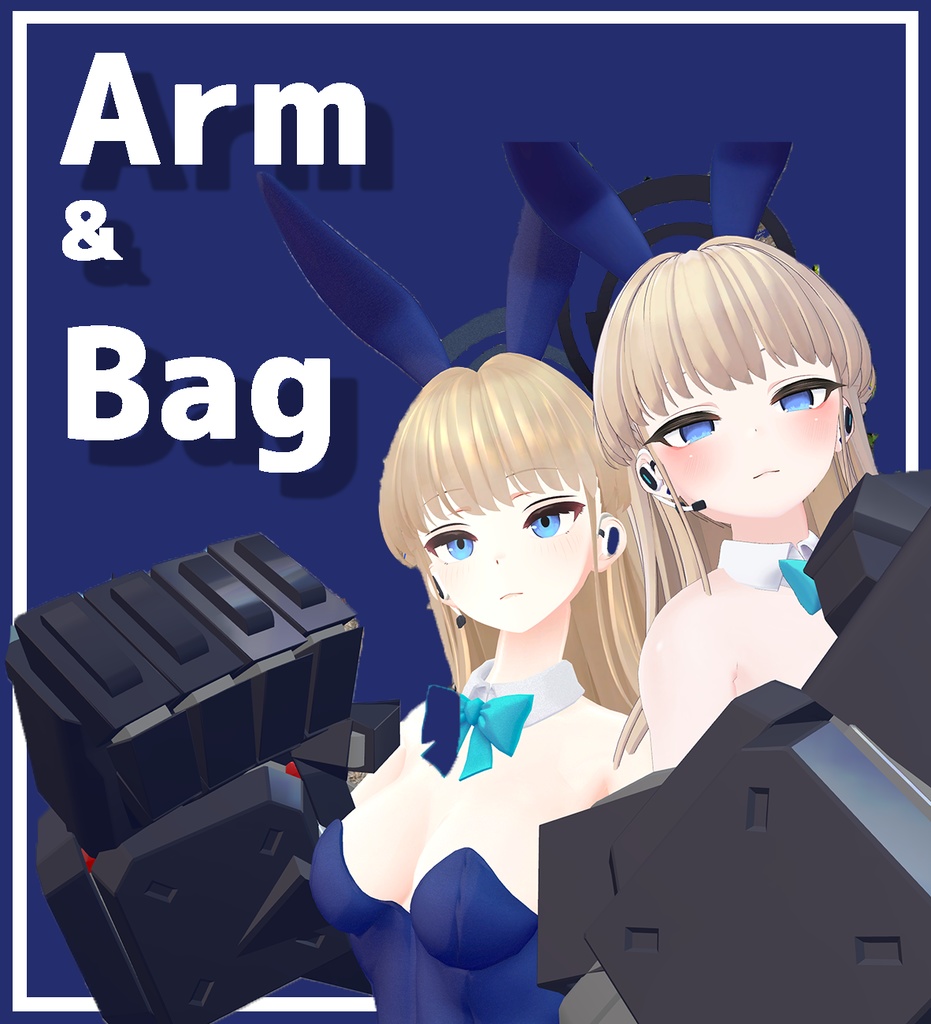
ARM BAG -バッグとして展開するロボットアーム-
- ダウンロード商品¥ 1,200
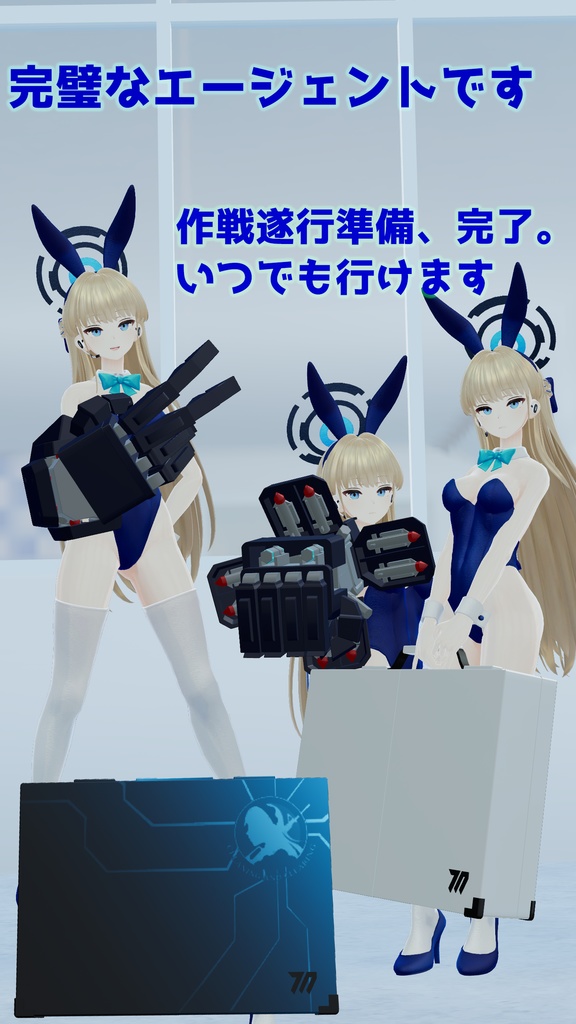
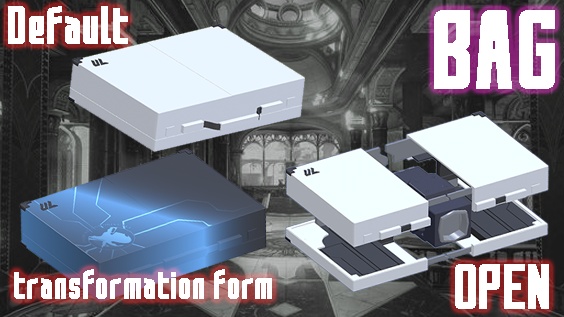
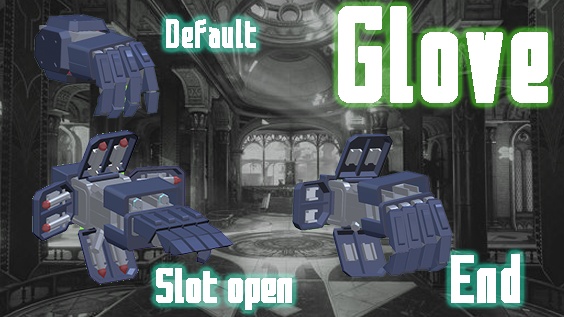
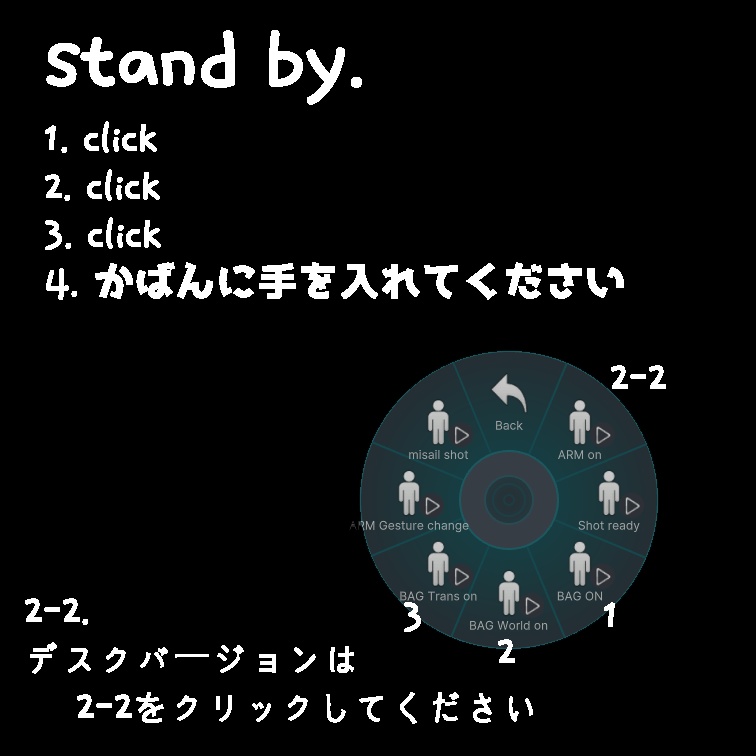
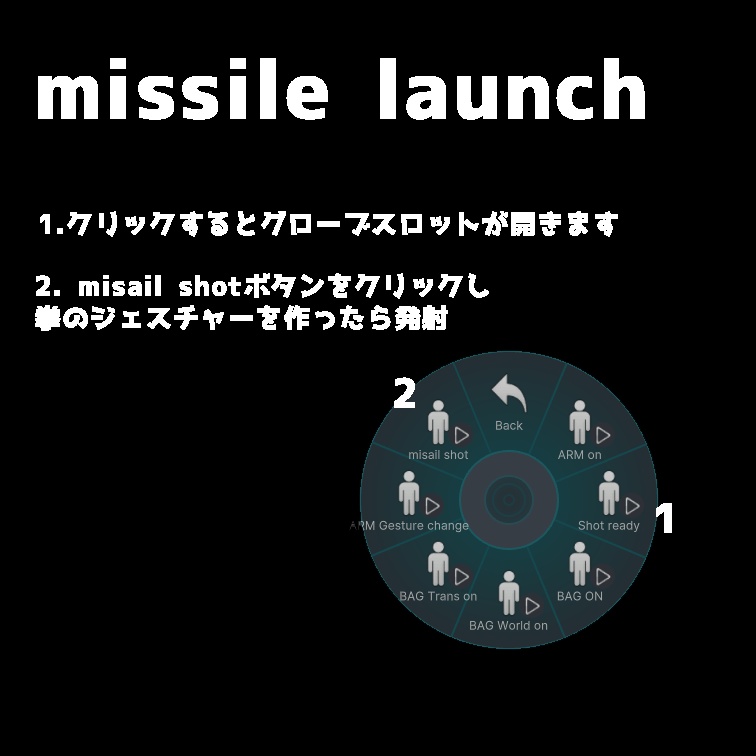
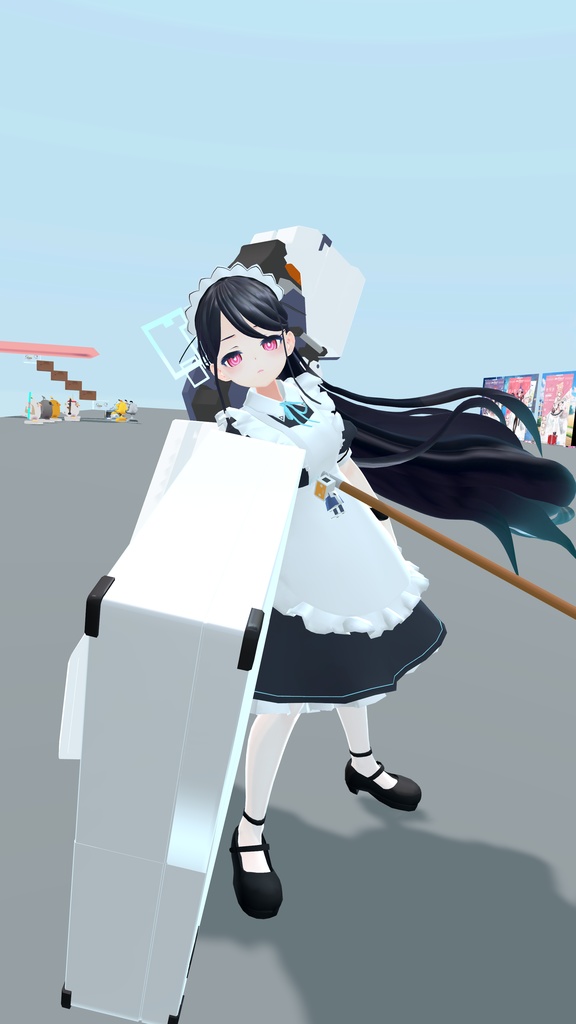
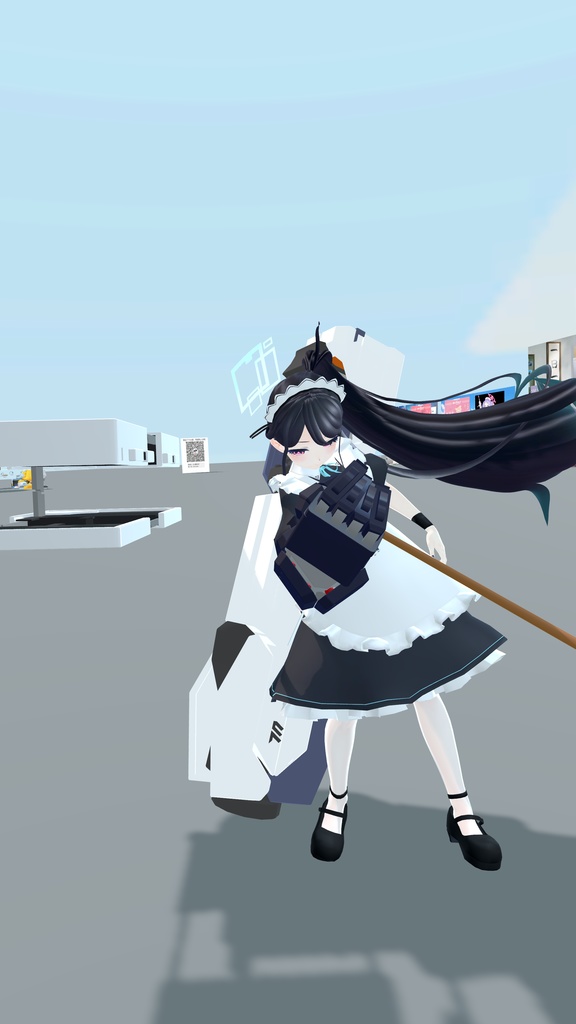
-JP- どの戦闘メイドが使う戦闘用アームのvrcバージョンです。 本格的な説明の前に注意事項をいくつか作成して開始いたします。 今回のおもちゃは様々なアセットと事前作業が必要です。 今回は写真説明は存在しません。映像資料をご覧になった後、じっくり進めてください。 難易度自体は、これまでに販売されていたおもちゃよりも簡単です。 ただし、使用する必要があるアセットとは別のものがあるため、このマニュアルは少し長く書かれています。 MeshDeleter: https://booth.pm/ja/items/1501527 VRLABS : https://github.com/VRLabs/Avatars-3.0-Manager/releases/tag/2.0.28 poiyomi 9.0.54: https://github.com/poiyomi/PoiyomiToonShader/releases (製作者はポイヨミ基準です。他のシェーダはそれぞれ独自の方法で改変してください) 1. 付属のフォルダ(arm BAG)からarm bag frepabを着用するキャラクタープロジェクトの中に入れてください 2. 位置を調整してください(おおよその位置はキャラクターの手に目安にしてください) 3. unpack prepabを進行した後、必ずHand parent内部のボンをキャラクターボーン内部に全て移動してください(指含む) 4. bagはOff、装着するキャラクターのbody all(ボディ)をコピー(コントロール+D)してから名前をARMに変更してください。 その後、メッシュデリッターを使ってコピーされたARMを本体のbody allと逆になるように消去してください。 (同封の映像1:50から参考にしてください) 5. VRLABSを利用してFXとgesure、parameterなどを合成してください。 6. メニューを作成してください(同封の映像4:06から参考にしてください) 文章や動画だけを見ると、最初は確かに難しいかもしれません。 ただ、説明に記載されているとおり、次々と進めば簡単な作業なので、もう少し気にしてください。 ありがとうございます。 -ENG- This is a VRC version of the combat arm used by a combat maid. Before we begin the detailed explanation, let's start by writing down a few precautions. This toy requires various assets and pre-work. There is no photo caption this time. Please proceed step by step after watching the video. The level of difficulty itself is easier than the toys the company has sold so far. However, because there are more assets that need to be used, this manual is a bit longer. MeshDeleter: https://booth.pm/ja/items/1501527 VRLABS : https://github.com/VRLabs/Avatars-3.0-Manager/releases/tag/2.0.28 poiyomi 9.0.54: https://github.com/poiyomi/PoiyomiToonShader/releases (The creator is based on Poiyomi. Please modify other shaders in your own way.) 1. In the enclosed folder (arm BAG), place the arm bag frepab into the character project to be worn. 2. Adjust the position (refer to the character's hand for the approximate position) 3. After unpack prepab, be sure to move all bones inside the hand parent to inside the character bones (including fingers). 4. Turn off the bag, copy (Control + D) the entire body of the character to be equipped, and change the name to ARM. Afterwards, use the mesh deleter to erase the copied ARM so that it is opposite to the body all. (Please refer to the enclosed video starting at 1:50) 5. Please use VRLABS to synthesize FX, gestures, parameters, etc. 6. Create a menu (please refer to the attached video starting at 4:06) It can definitely be difficult at first if you only look at the text and videos. However, please pay a little more attention as these are simple tasks if you proceed step by step as described in the description. thank you -KOR- 어느 전투메이드가 쓰는 전투용 암의 vrc 버전입니다. 본격적인 설명의 앞서 주의사항을 몇가지 작성하고 시작하겠습니다. 이번 장난감은 여러가지 에셋과 사전작업이 필요합니다. 이번엔 사진설명은 존재하지않습니다. 영상자료를 보신후에 차근차근 진행해주세요. 난이도 자체는 지금까지 자사에서 판매되었던 장난감보다 쉽습니다. 그렇지만 사용해야하는 에셋이라던가가 더 있기 때문에 본 설명서는 조금 길게 작성됩니다. MeshDeleter: https://booth.pm/ja/items/1501527 VRLABS : https://github.com/VRLabs/Avatars-3.0-Manager/releases/tag/2.0.28 poiyomi 9.0.54: https://github.com/poiyomi/PoiyomiToonShader/releases (제작자는 포이요미 기준입니다. 다른 쉐이더는 각자만의 방법으로 개변해주세요) 이상 몇가지의 에셋이 필요하니 준비해주시기 바랍니다. 1. 동봉된 폴더(arm BAG)에서 arm bag frepab을 착용할 캐릭터 프로젝트 안에 넣어주세요 2. 위치를 조정하여 주세요 (대략적인 위치는 캐릭터의 손에 기준잡아주세요) 3. unpack prepab을 진행하신후 반드시 Hand parent내부의 본을 캐릭터 본 내부로 전부 이동해주세요(손가락포함) 4. bag은 Off, 장착할 캐릭터의 body all(몸)를 복사(컨트롤+D)하신후 이름을 ARM으로 변경해주세요. 후에 메쉬딜리터를 이용해서 복사된 ARM을 본체의 body all과 반대되도록 지워주시면 됩니다. (동봉된 영상 1:50부터 참고해주세요) 5. VRLABS를 이용하여 FX와 gesture, parameter등등을 합성해 주시기 바랍니다. 6. 메뉴를 생성해주세요 (동봉된 영상 4:06부터 참고해주세요) 글과 동영상만 보면 처음에는 확실히 어려울 수 있습니다. 다만 설명에 기재된대로 차근차근 진행하면 간단한 작업들이니 조금 더 신경써주세요. 감사합니다.